Members Management Inside Groups” provides the framework for establishing a structured and well-regulated community within your CRM platform. It details the distinctive roles within a group – Owners, Admins, Moderators, and Contributors – and their responsibilities. It further guides you on inviting members, adjusting roles, access control, and migrating from existing communities.
Covered in this Article:
Comprehensive Guide on Members Management Inside Community Groups
Understanding Member Roles
1. Owner:
2. Admin:
3. Moderators:
4. Contributors:
Here’s a breakdown of the table:
Inviting Members to the Group
Modifying Member Roles and Access Control
Changing Member Email/Phone Visibility:
Removing Members from a Group
Migrating Members from Existing Communities
FAQs
Q: Can I set up an automated invitation for new clients added to my CRM?
Q: I have a large list of potential members. Is there a way to invite them all at once?
Q: Can members invite others to the group, or is this feature exclusive to admins and owners?
Q: I sent an invitation, but the member hasn’t joined yet. Can I resend the invitation?
Q: Can I personalize the invitation sent to potential members?
Q: What happens when an invited member tries to join the group?
Q: Can I track who has accepted the invitation and joined the group?
Comprehensive Guide on Members Management Inside Community Groups
Community groups within a CRM platform are the beating heart of an online community. They foster interactive discussions, connect individuals with shared interests, and serve as knowledge-sharing hubs. Managing these groups effectively is crucial for maintaining a healthy and productive environment. This article provides a comprehensive guide on managing members within community groups.
Understanding Member Roles
A well-structured community group has a hierarchy of roles, each with distinct responsibilities and capabilities. Here are the four key roles:
1. Owner:
As the highest-ranking role, an Owner holds full administrative control over the group, even the authority to delete the group if necessary.
2. Admin:
Admins manage group members effectively. They can add or remove members and assign administrative privileges, thus allowing others to assist in managing the group.
3. Moderators:
Moderators maintain the group’s integrity. They monitor and moderate content within the group, ensuring it adheres to community guidelines and fosters a respectful environment.
4. Contributors:
Contributors are the group’s lifeblood, driving discussions and engaging with content. They can post discussions, add comments, and show their engagement with likes.
Understanding these roles enables effective management and moderation, ensuring each member can participate appropriately.
| Role | Create Posts | Moderate Posts | Manage Members | Delete Group |
|---|---|---|---|---|
| Owner | ✔️ | ✔️ | ✔️ | ✔️ |
| Admin | ✔️ | ✔️ | ✔️ | ❌ |
| Moderator | ✔️ | ✔️ | ❌ | ❌ |
| Contributor | ✔️ | ❌ | ❌ | ❌ |
Here’s a breakdown of the table:
Create Posts: This is the ability to create and publish new posts in the group. All roles except for ‘Owner’ and ‘Admin’ may or may not have this ability, depending on the settings established by the ‘Owner.’
Moderate Posts: This is the ability to moderate, edit, or delete posts made by other group members. This ability is typically reserved for ‘Owners,’ ‘Admins,’ and ‘Moderators.’
Manage Members: This includes adding new members, changing members’ roles, and removing members from the group. Typically, this ability is reserved for ‘Owners’ and ‘Admins.’
Delete Group: This is the ability to delete the group entirely. This ability is typically reserved only for the ‘Owner’ to prevent accidental or unauthorized deletion of the group.

Inviting Members to the Group
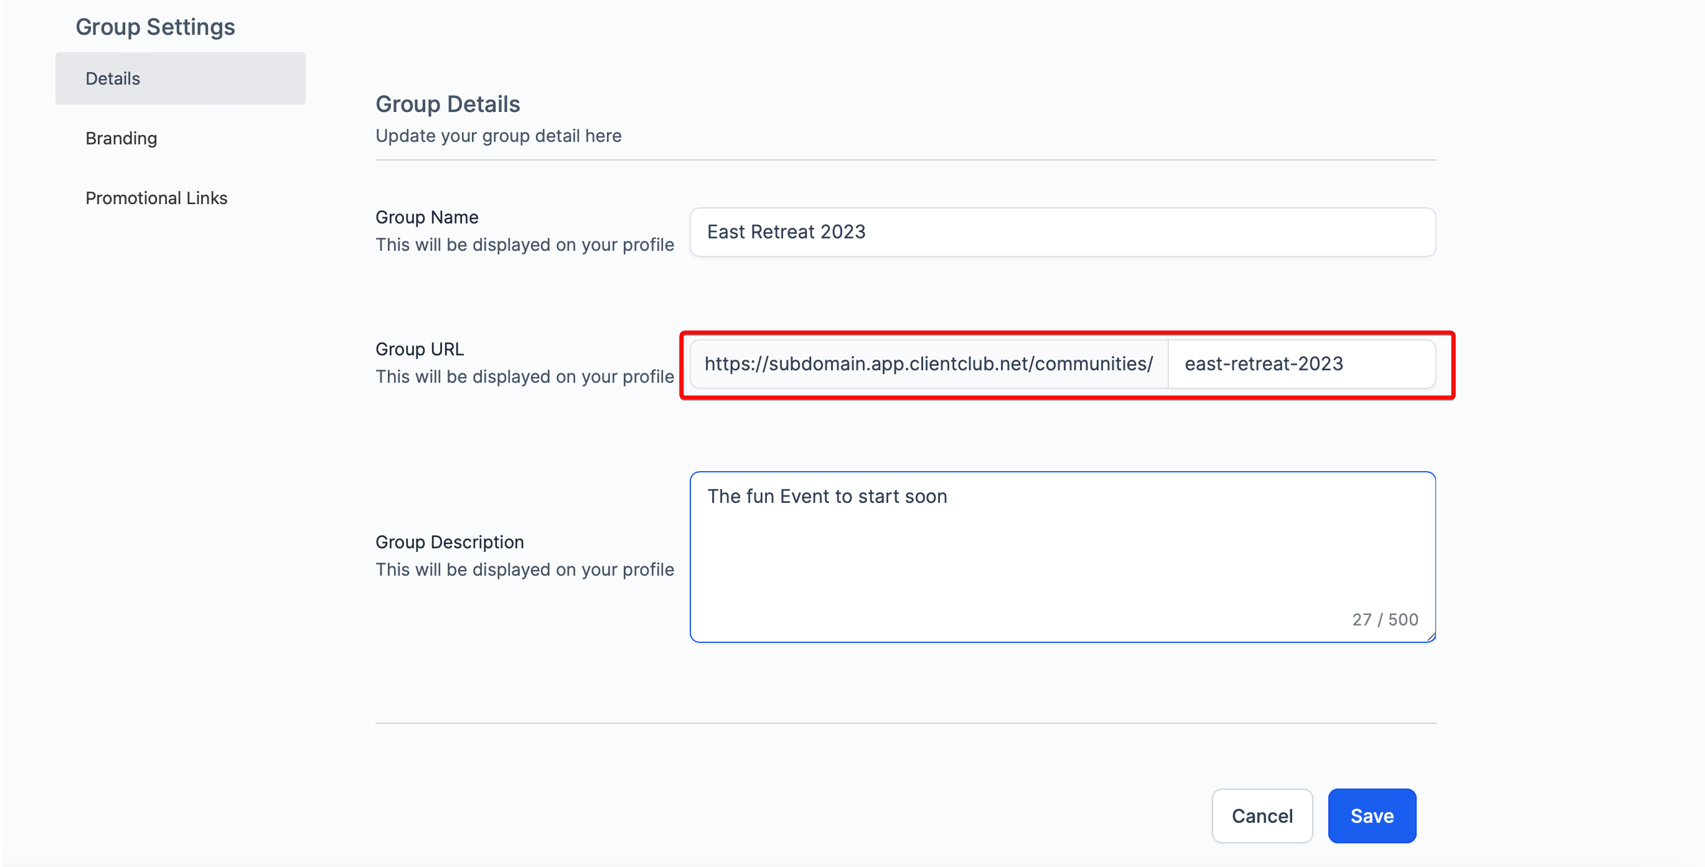
In the near future, we have plans to introduce in-app methods for inviting members to join your group. However, currently, you can initiate the process by copying the group URL and utilizing it in email and SMS campaigns to invite your members to join the community group. Here’s a rephrased version:
In the upcoming updates, we will introduce convenient in-app methods to invite members directly to your group.
In the meantime, you can begin by copying the unique group URL provided.

Utilize this URL in your email and SMS campaigns, encouraging your members to join the community group.
Including the group URL in your campaigns enables your members to access and join the community group easily.
Please Note:You can create custom values for each Group URL and drop the custom values in your email/sms campaigns and automations. That way if you decide to change a Group URL you can just go ahead and change it in the custom values and send it again to everyone who has received it and to new entrants.
As we continue to enhance the platform, we aim to introduce more streamlined and integrated ways of inviting members to join your group within the app.
Modifying Member Roles and Access Control
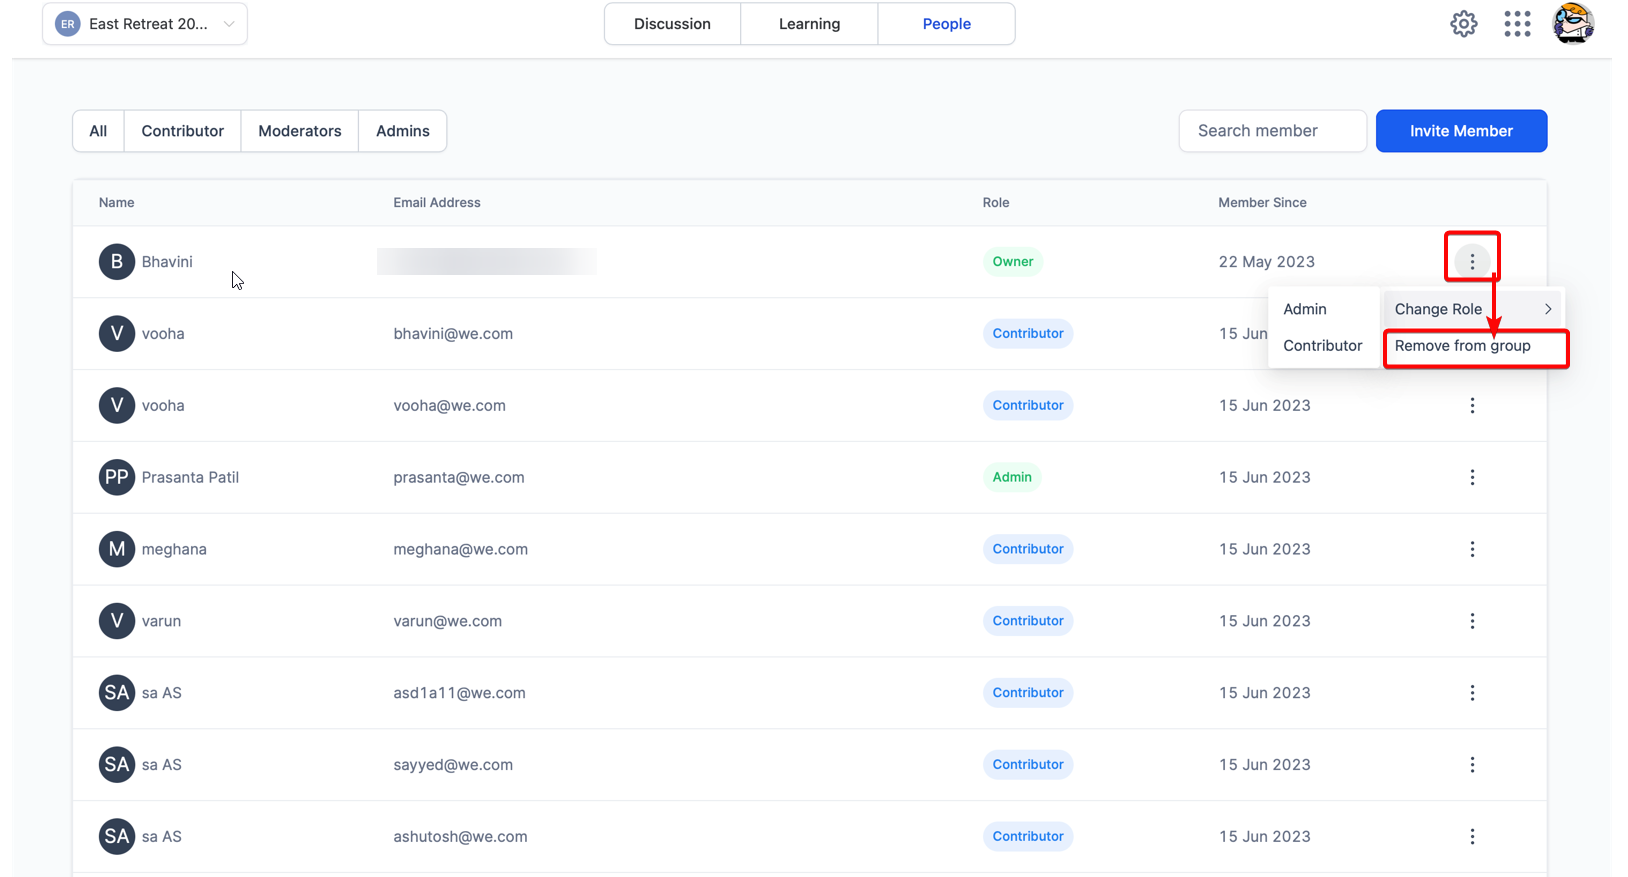
Admins and owners can manage the access of group members within the community. To modify the access of a member, follow these steps:
- When logged in to the group, navigate to the “People” tab at the top of the page.
- In the “People” tab, you can search or apply filters to locate the specific member you wish to modify.
- Once you have found the member, click the three dots icon on their profile’s right side.
- Select the appropriate role or access level you want to assign to the member from the options presented.
- By choosing the relevant role, you can effectively update and manage the member’s access within the group.
- By utilizing the “People” tab and the available options, admins and owners can easily control and adjust the access levels of group members based on their responsibilities and permissions.
Changing Member Email/Phone Visibility:
Users can click on their initials on the top right to access their View or Edit Profile area. From here, they can access the Social Media tab to choose whether or not they wish their Email/Phone to be visible.
Removing Members from a Group
Admins and owners have the authority to manage group members’ access, including the ability to remove them from the group. To revoke access from a member, follow these steps:
- While logged in to the group, navigate to the “People” tab at the top of the page.
- In the “People” tab, you can search or apply filters to locate the specific member you wish to remove.
- Once you have identified the member, click the three dots icon on their profile’s right side.
- From the options available, select the “Remove from Group” option.
- By selecting this option, you effectively remove the member’s access and privileges from the group.
- By utilizing the “People” tab and following these steps, admins and owners can easily manage the access of group members, including the ability to remove them from the group when necessary.

Migrating Members from Existing Communities
Transitioning to Communities from an existing platform is a straightforward process.
- Create a group within Communities, ensuring the group name matches or aligns with your existing platform.
- Configure the branding of the group to maintain consistency with your previous platform. This includes selecting the same custom domain and group name you have used before.
- To facilitate a smooth transition, sending welcome emails to your existing clients, notifying them about the move to Communities, and inviting them to join the new group are recommended.
- As a welcoming gesture to new members, pin a post in the group that provides a warm introduction and sets the expectations for their participation.
FAQs
Q: Can I set up an automated invitation for new clients added to my CRM?
A: As of now, Communities doesn’t support automated invitations. However, it is a feature we want to add in the future. You can manually invite new clients by copying and sharing the group URL.
Q: I have a large list of potential members. Is there a way to invite them all at once?
A: You can invite multiple members at once by sending out a mass email or SMS campaign with the group URL included. This makes it easy for them to access and join the community.
Q: Can members invite others to the group, or is this feature exclusive to admins and owners?
A: Typically, members can share the group URL with others, effectively inviting them. However, to maintain control over group membership, Admins and Owners can remove anyone they do not wish to allow in a group. Private Groups are in the timeline for later.
Q: I sent an invitation, but the member hasn’t joined yet. Can I resend the invitation?
A: Absolutely. It’s possible the invitation was missed, or they haven’t had a chance to join yet. Resend the group URL to give them another opportunity to join.
Q: Can I personalize the invitation sent to potential members?
A: Invitations can be personalized within your CRM, email, or SMS platform when you share the group URL. However, the Communities platform currently doesn’t support the personalization of invitations within the system.
Q: What happens when an invited member tries to join the group?
A: When an invited member clicks on the group URL, they are directed to the group where they can request to join. They are admitted automatically upon signing up.
Q: Can I track who has accepted the invitation and joined the group?
A: Yes, within the “People” tab in your group, you can see all the members of your group, including those who have recently joined. This allows you to keep track of membership and engagement levels.
