This article explains how to connect social messaging channels so incoming messages appear together in a single inbox. Once connected, conversations from different messaging channels can be viewed and managed in one place, making it easier to respond quickly, stay organized, and maintain a complete conversation history.
This guide is written for customers who want a simple, reliable way to manage social messages without switching between multiple tools.
TABLE OF CONTENTS
- Start the Social Messaging Connection
- Starting the Social Messaging Connection
- Link the Messaging Account to Enable Message Syncing
- Linking a Messaging Account for Inbox Delivery
- Confirm Messages Are Appearing Correctly
- Frequently Asked Questions
- Need More Help?
Start the Social Messaging Connection
Social messaging is connected from the area where integrations or connected services are managed. This is where access to external messaging channels is enabled.
Open the settings area and navigate to the section used to manage integrations. Locate the social messaging option and begin the connection process. Starting this connection prepares the inbox to receive messages once account access is approved.
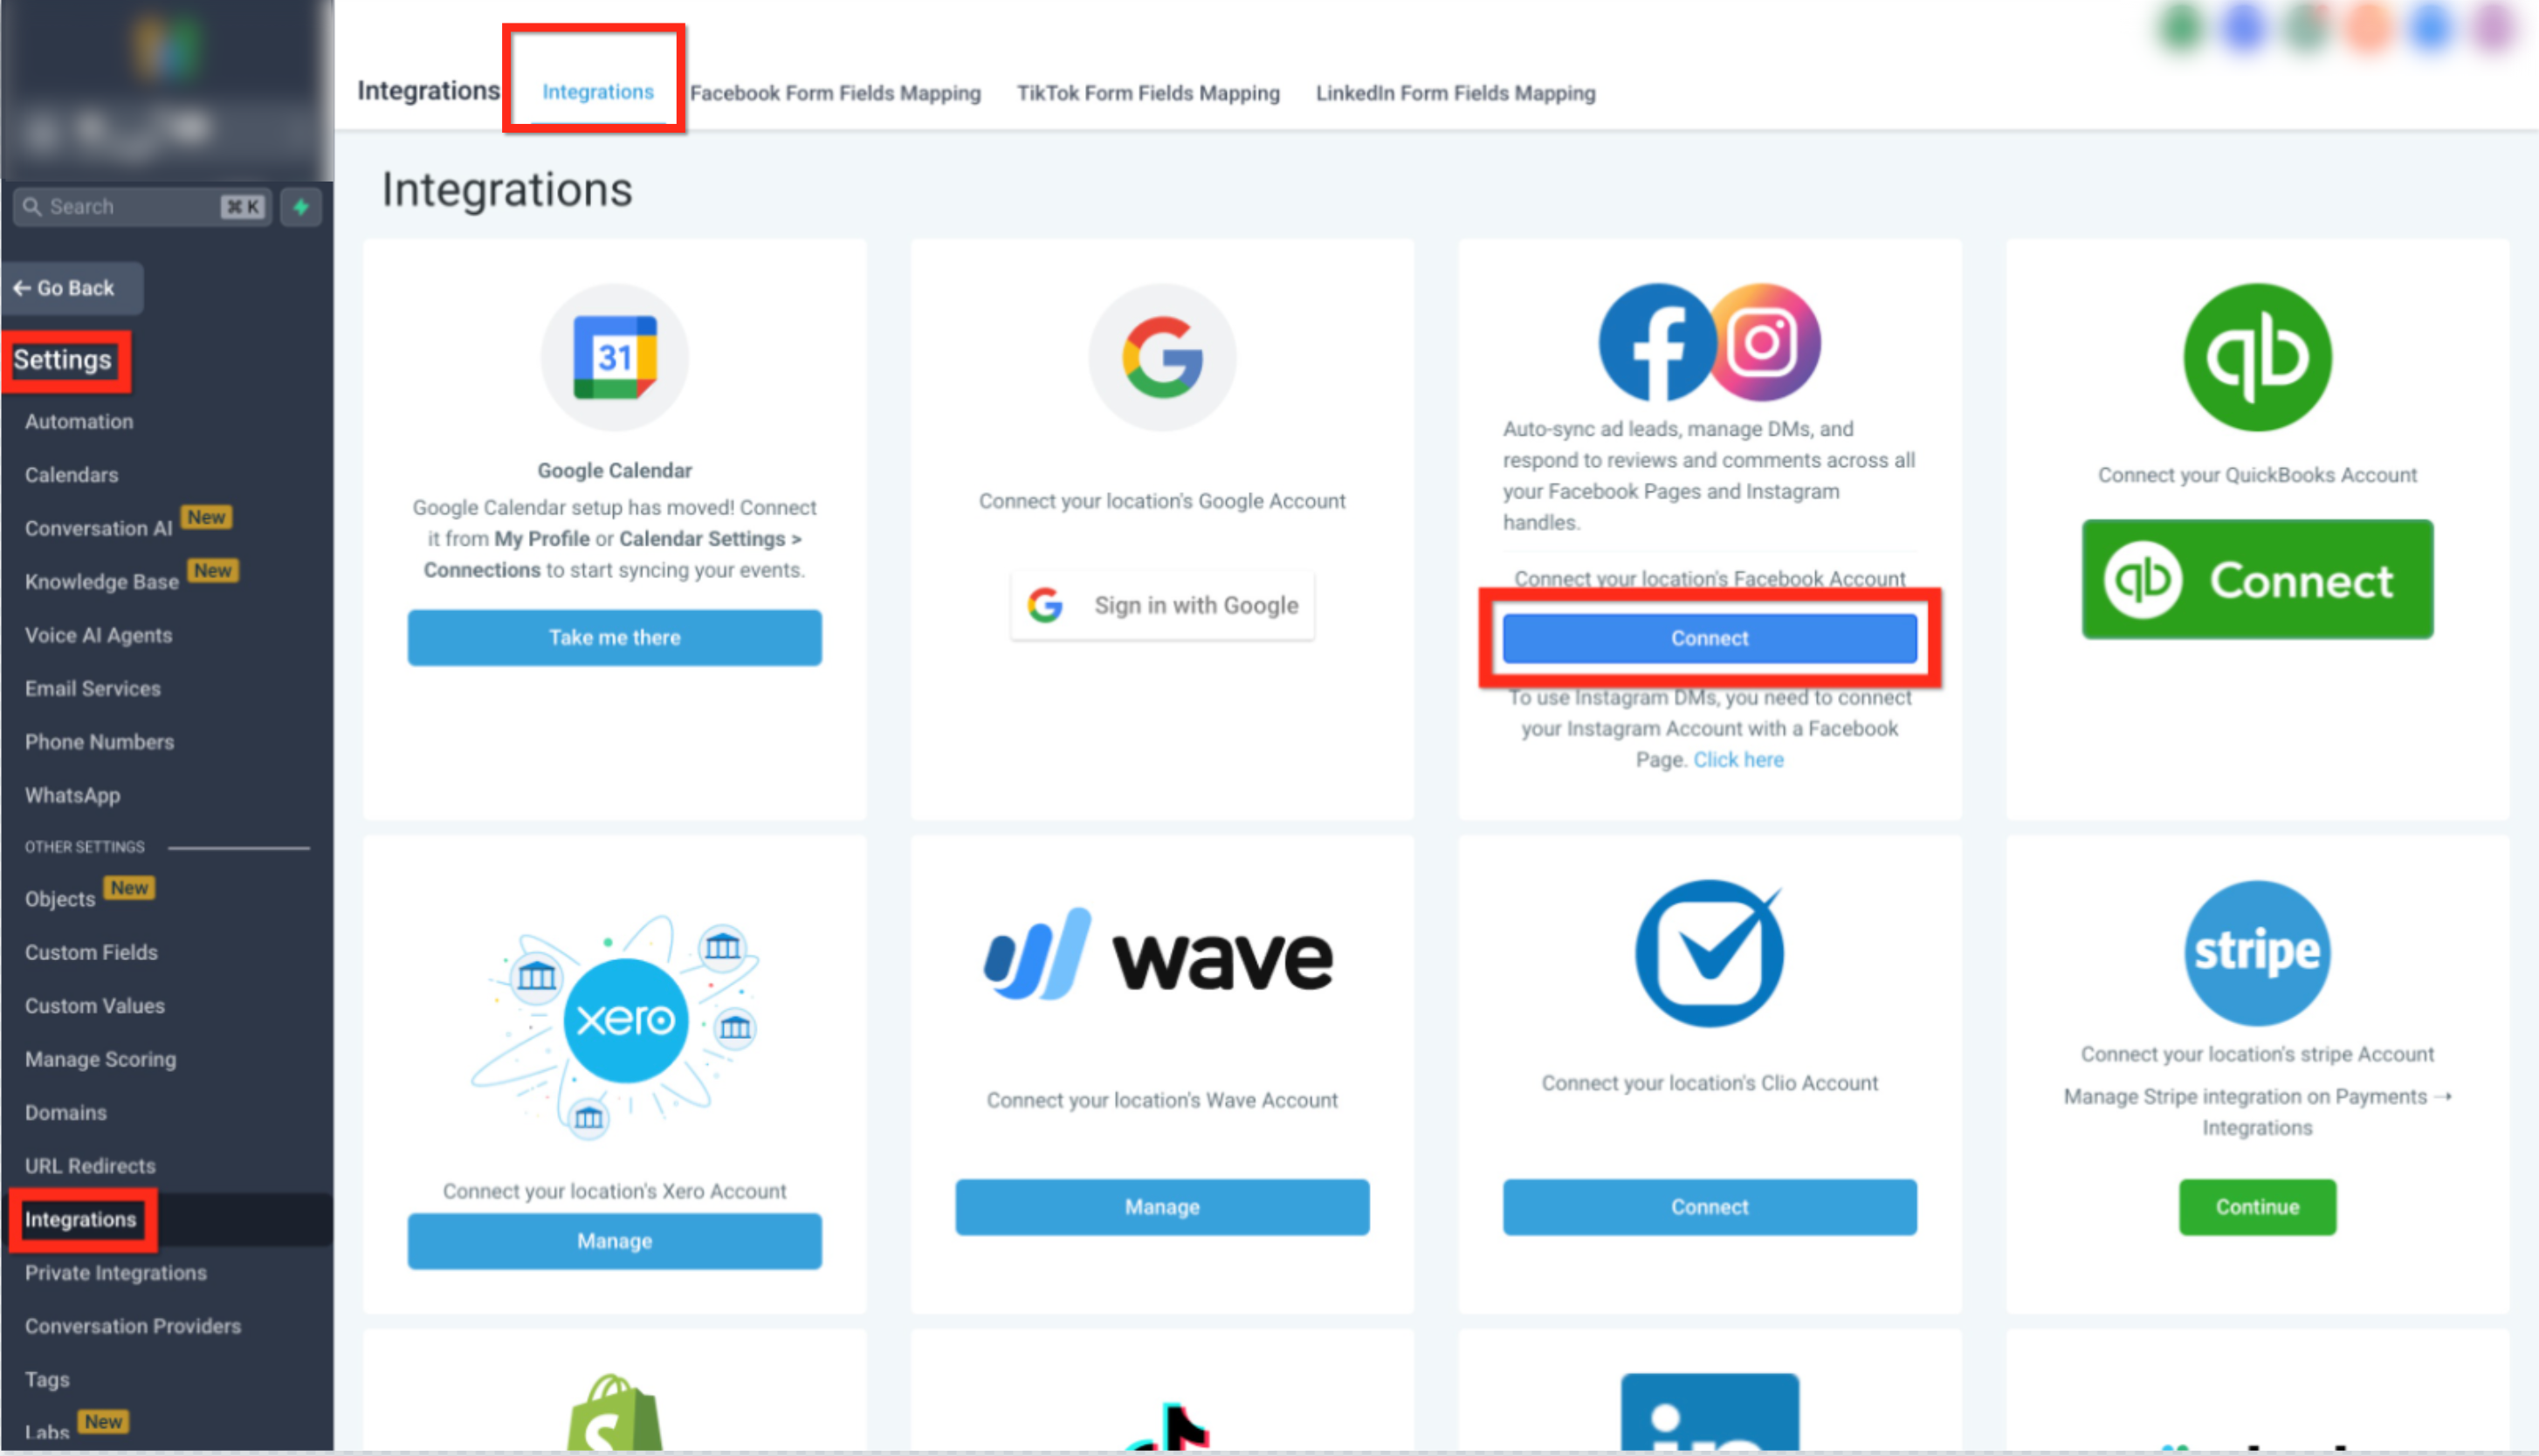
Starting the Social Messaging Connection
This screenshot shows where to begin the connection. Open the settings area, select the integrations section, and locate the social messaging option. Click the connect button shown to start the messaging connection process.
Link the Messaging Account to Enable Message Syncing
After starting the connection, the messaging account must be linked so conversations can be delivered into the inbox.
Access the account settings shown during the connection flow and locate the option used to manage linked messaging accounts. Select the option to connect a messaging account, complete the sign-in process, and confirm the connection. Messaging permissions should remain enabled to allow messages and replies to sync correctly.
Once this step is complete, messages from the linked channel are eligible to appear in the inbox.
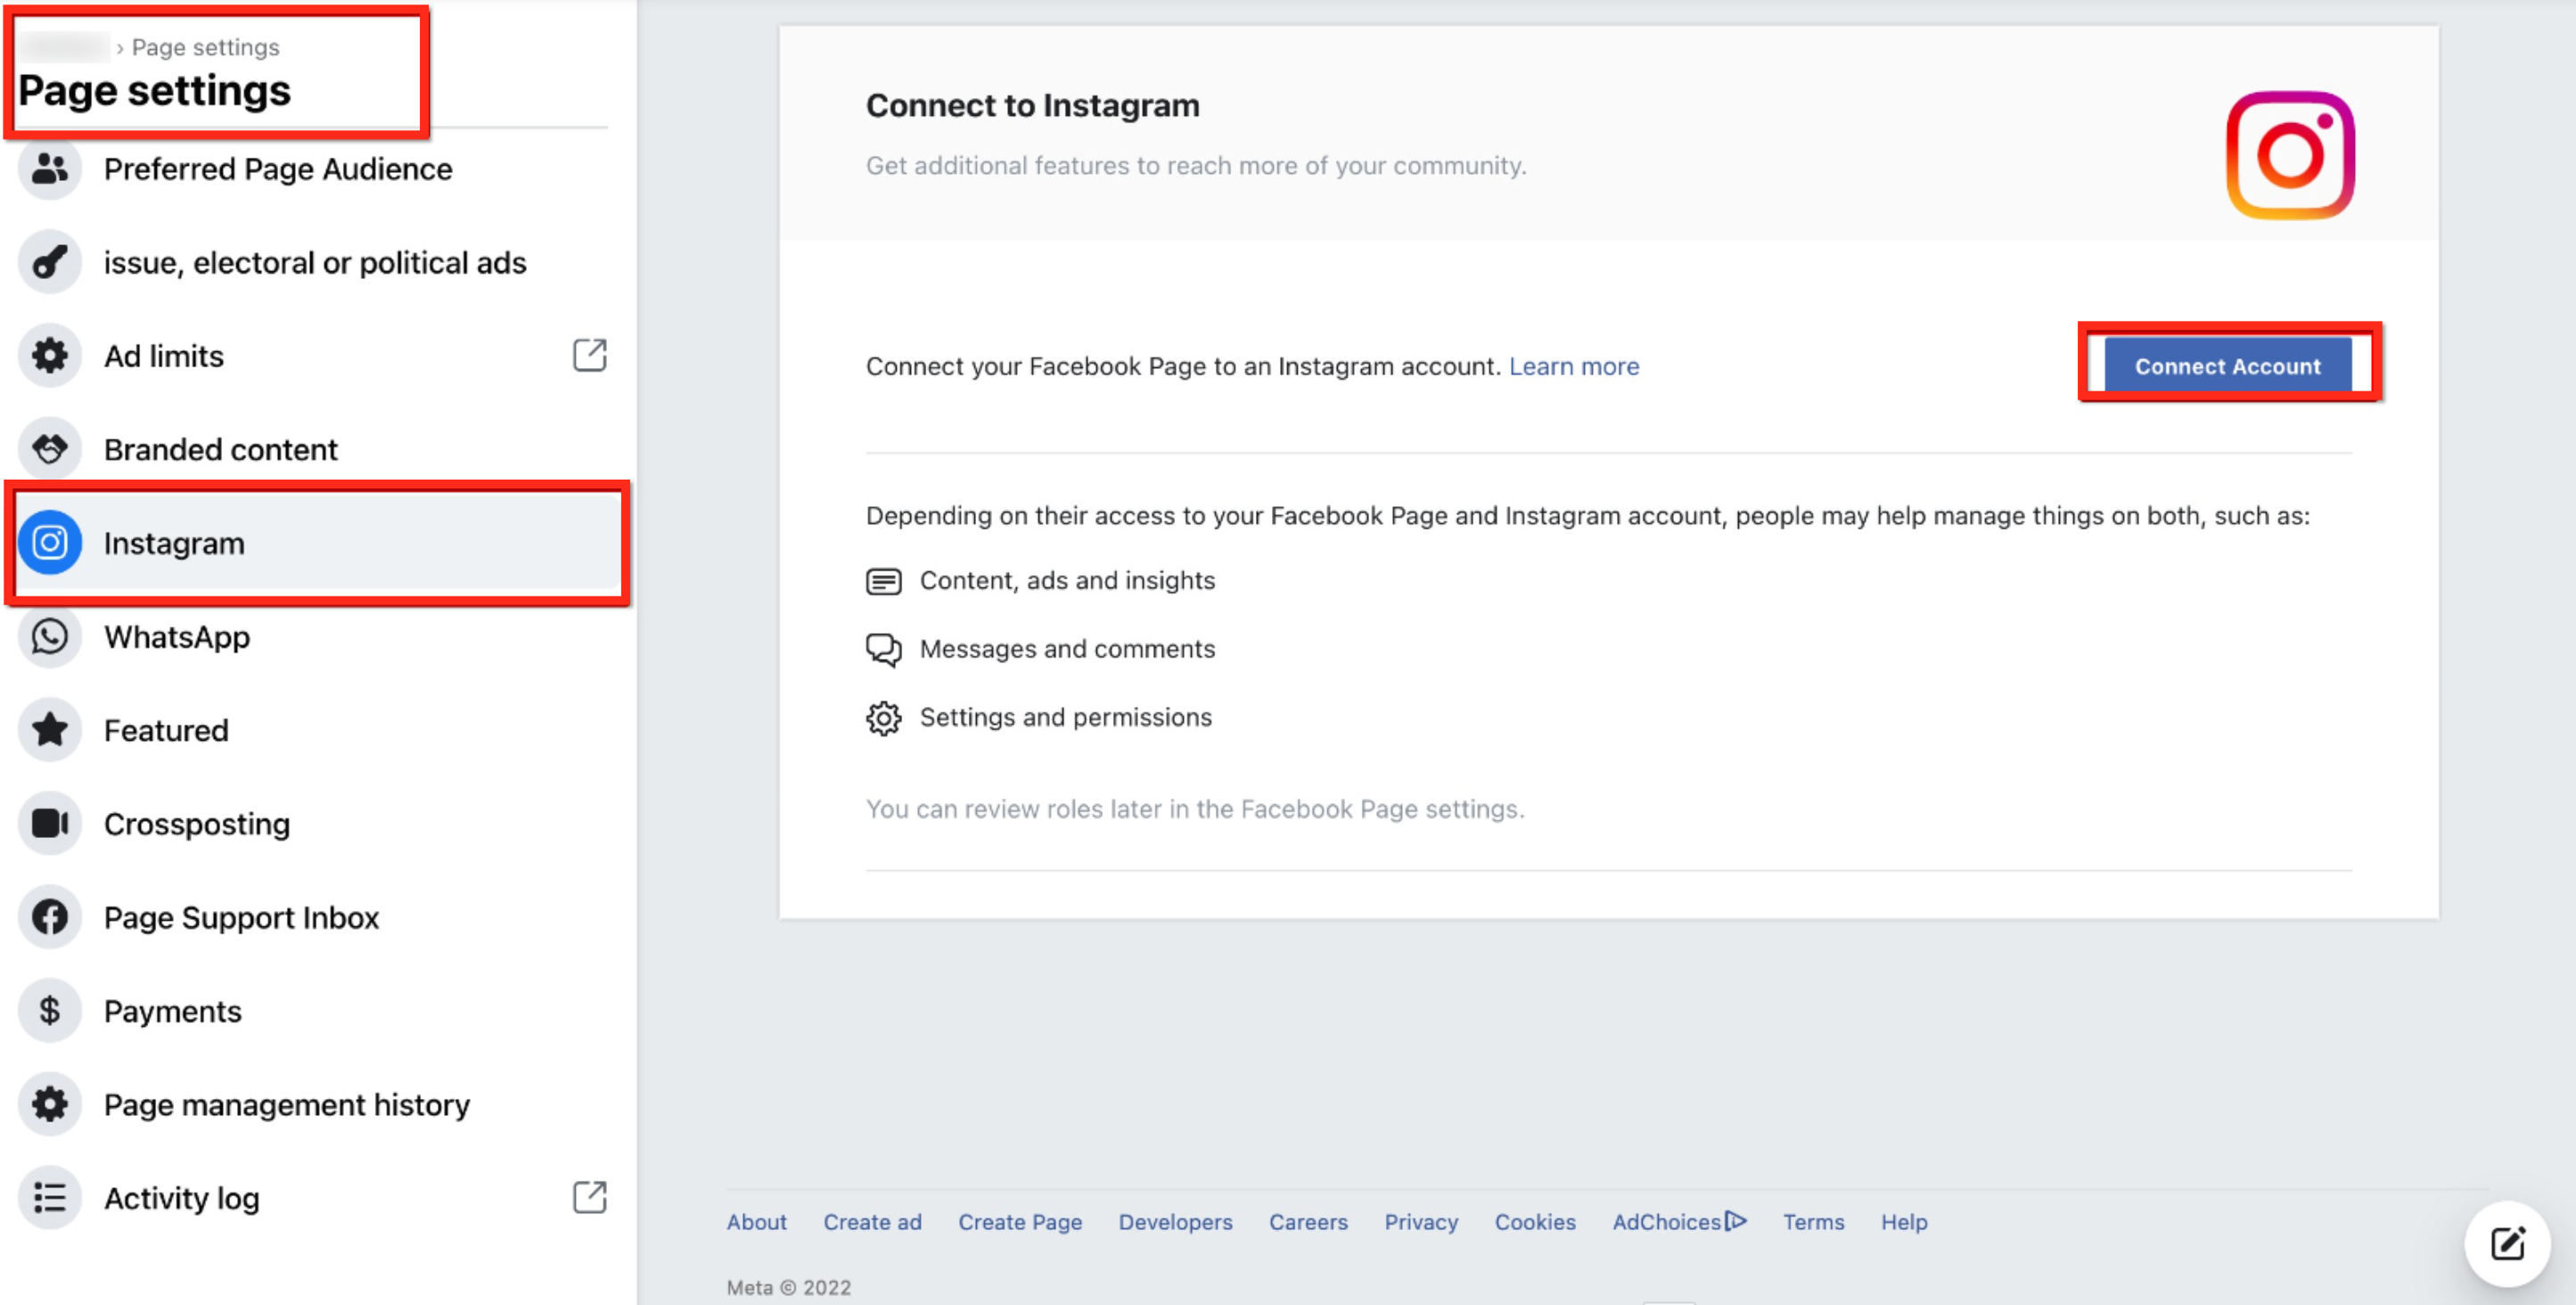
Linking a Messaging Account for Inbox Delivery
This screenshot shows where to link a messaging account. Select the messaging option from the account settings menu, click the connect account button, sign in when prompted, and confirm the connection to allow messages to be delivered into the inbox.
Confirm Messages Are Appearing Correctly
After setup is complete, confirm the connection is working as expected.
Send a test message from the connected messaging channel and review the inbox. Messages should appear shortly after being sent.
If the message appears correctly, the connection is active and ready for ongoing use.
Frequently Asked Questions
Q: What type of account is required for messages to sync?
Messaging accounts must support external connections and allow messaging permissions. Personal-only accounts may not support message syncing.
Q: Will messages sent before connecting appear in the inbox?
Messages sent after the connection are guaranteed to sync. Some recent message history may appear depending on permissions and limitations.
Q: Can more than one messaging account be connected to the same inbox?
Each inbox supports one messaging connection and its linked account. Additional accounts require separate inbox connections.
Q: What should I do if messages stop appearing?
Review messaging permissions, confirm the account is still linked, and reconnect the messaging connection if access settings have changed.
Need More Help?
If messages are not appearing as expected, review the messaging account permissions and confirm the account is still connected. Reconnecting the messaging account can resolve most syncing issues caused by permission changes.
Additional help articles are available covering inbox management, message syncing, and common connection issues.