The Date/Time Formatter action is a versatile tool that allows users to reformat date or date and time structures and compare dates within workflows. This feature enables easy conversion of date formats for compatibility with different applications, database storage, or communication channels like email, SMS, or Slack. It also facilitates the comparison of dates to calculate the difference in days, simplifying date-related calculations and decision-making.
Covered in this Article:
What is the Date/Time Formatter Premium Workflow Action?
What are some excellent usage cases, and whom is this feature useful for?
What are the benefits of this feature?
How to use the Date/Time Formatter Premium Workflow Action?
Format Date
Field Selection:
From Format:
To Format:
Output:
Format Date/Time
Field Selection:
From Format:
To Format:
Output:
Compare Dates
Start Date Selection:
Start Date Format:
End Date Selection:
End Date Format:
Output:
Points to remember:
What is the Date/Time Formatter Premium Workflow Action?
The Date/Time Formatter action is a simple tool that helps you work with dates and times in your automated tasks. Here are the three main features and their steps:
Changing the appearance of dates:
a. Pick a date you want to change.
b. The tool will figure out the date format for you.
c. Choose a new format from a list.
d. The tool changes the date to the new format.
Changing the appearance of dates and times:
a. Pick a date and time you want to change.
b. The tool will figure out the date and time format for you.
c. Choose a new format from a list.
d. The tool changes the date and time to the new format.
Comparing two dates to see their difference:
a. Pick a start date and an end date.
b. The tool will figure out the date formats for you.
c. The tool calculates the difference in days between the two dates.
With these features, you can easily change how dates and times look or compare two dates, making it simple to share or save information in the correct format.
What are some excellent usage cases, and whom is this feature useful for?
The Date/Time Formatter action is helpful in various scenarios and for users who need to manage and manipulate date and time data. Here are some usage cases:
Event organizers: Format event start and end dates and times received from different sources to maintain consistency and make the data more readable.
Marketing teams: Use formatted date and time information in email campaigns, SMS, or Slack messages for personalized and time-sensitive communication.
Sales teams: Compare the current date with invoice due dates to send automated reminders to clients with upcoming or overdue payments.
Customer support teams: Reformat date and time data received via inbound webhook triggers to create support tickets or update CRM systems.
Project managers: Compare project start dates and deadlines to calculate the time remaining and send notifications to team members.
Data analysts: Store consistently formatted date and time data in spreadsheets or databases, making analyzing and generating reports easier.
Software developers: Integrate formatted date and time data from various sources in their applications, ensuring compatibility and smooth data processing.
E-commerce businesses: Reformat order and delivery date information for better tracking and customer communication.
What are the benefits of this feature?
The Date/Time Formatter action offers several benefits for users who need to work with date and time data in their workflows:
Consistency: Ensures date and time data is formatted uniformly across different platforms and applications, improving readability and reducing confusion.
Compatibility: Facilitates seamless data exchange and integration between various tools and systems by converting date and time formats as needed.
Time-saving: Automates date and time formatting tasks, reducing manual effort and errors, and allowing users to focus on more critical tasks.
Personalization: Enhances communication effectiveness by enabling the use of formatted date and time data in personalized messages, emails, or notifications.
Decision-making: Simplifies date comparisons and calculations, supporting informed decision-making in time-sensitive operations.
Flexibility: Offers a wide range of format options to cater to specific requirements or preferences, making it adaptable to various use cases.
Improved data management: Streamlines the storage and analysis of date and time data by ensuring consistency in databases or spreadsheets.
How to use the Date/Time Formatter Premium Workflow Action?
With the Date/Time Formatter action, you can reformat the Date or Date and Time as required. You can also compare dates using the action.
- Format Date
- Format Date and Time
- Compare Dates

Format Date
The Format Date function is a crucial feature of the Date/Time Formatter action, specifically designed to convert date structures from one format to another. Here’s a more detailed breakdown of the Format Date function:
Field Selection:
Choose the date field you want to reformat. You can select various sources such as a Specific Date, Current Date, Contact’s date fields, date type custom fields, Appointment start/end date, Custom values, or even from an Inbound Webhook Trigger.

Please Note:Currently, Contact Custom fields do not support the Date Time structure.
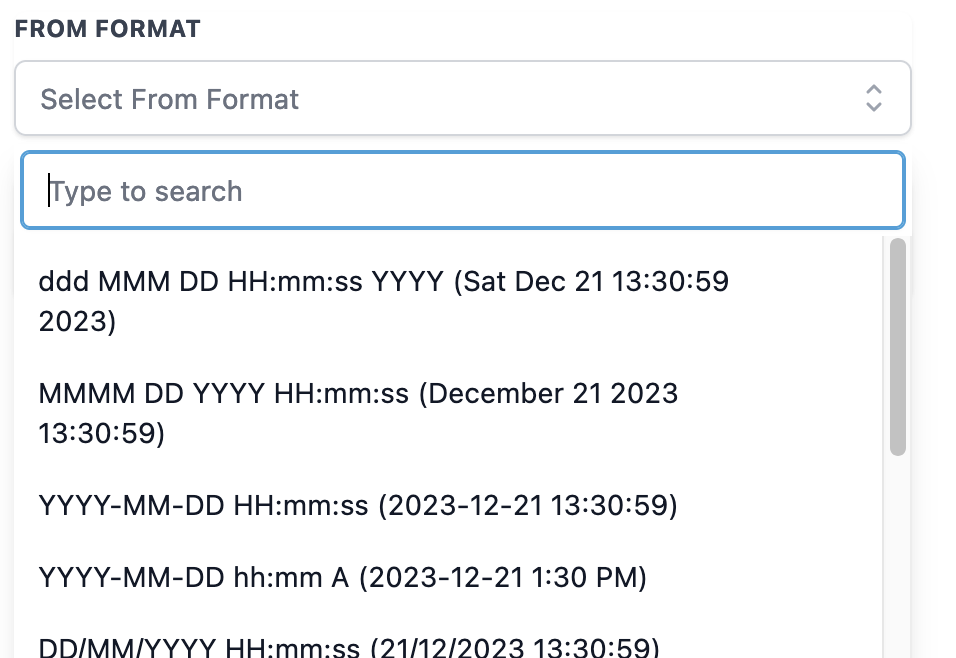
From Format:
If you select a system field like Specific Date, Current Date, Contact’s date type standard or custom fields, or Appointment start/end date, the tool will auto-detect the format and preselect it. You must manually select the matching format if you choose a Custom Value or an Inbound Webhook Trigger.
To Format:
Select the desired format for the output date from the list of available formats. This is the format the original date will be converted to.

Output:
Once you’ve set up the Format Date function, you can use the result in subsequent actions within your workflow. The output can be accessed using the dynamic variable: {{datetime_formatter.1.date}}

Format Date/Time
The Format Date and Time function is an essential feature of the Date/Time Formatter action, designed to convert date and time structures from one format to another. Here’s a more detailed explanation of the Format Date and Time function:
Field Selection:
Choose the date and time field you want to reformat. You can select various sources such as a Specific Date and Time, Current Date and Time, Appointment start/end date and time, Custom values, or even from an Inbound Webhook Trigger. Note that Contact Custom fields do not currently support Date Time structures.

Please Note:Currently, Contact Custom fields do not support the Date Time structure.
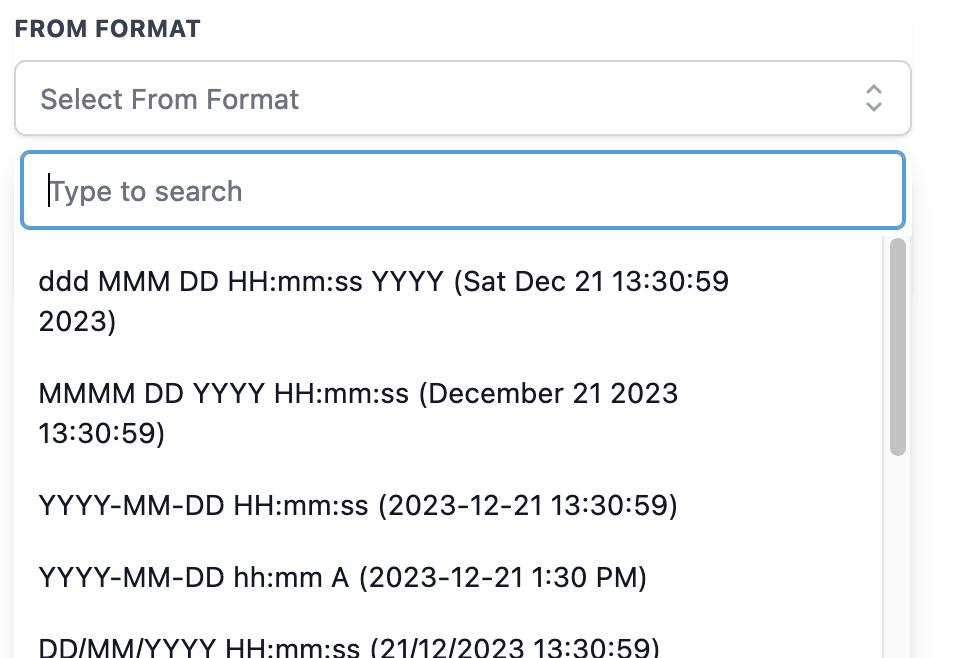
From Format:
The tool will auto-detect the format and preselect if you select a system field like Specific Date and Time, Current Date and Time, or Appointment start/end date and time. You must manually select the matching format if you choose a Custom Value or an Inbound Webhook Trigger.
To Format:
Select the desired output date and time format from the list of available formats. This is the format the original date and time will be converted to.

Output:
Once you’ve set up the Format Date and Time function, you can use the result in subsequent actions within your workflow. The output can be accessed using the dynamic variable: {{datetime_formatter.1.datetime}}

Compare Dates
The Compare Dates function is a valuable feature of the Date/Time Formatter action that allows users to compare two dates and obtain the difference in days. Here’s a detailed overview of the Compare Dates function:
Start Date Selection:
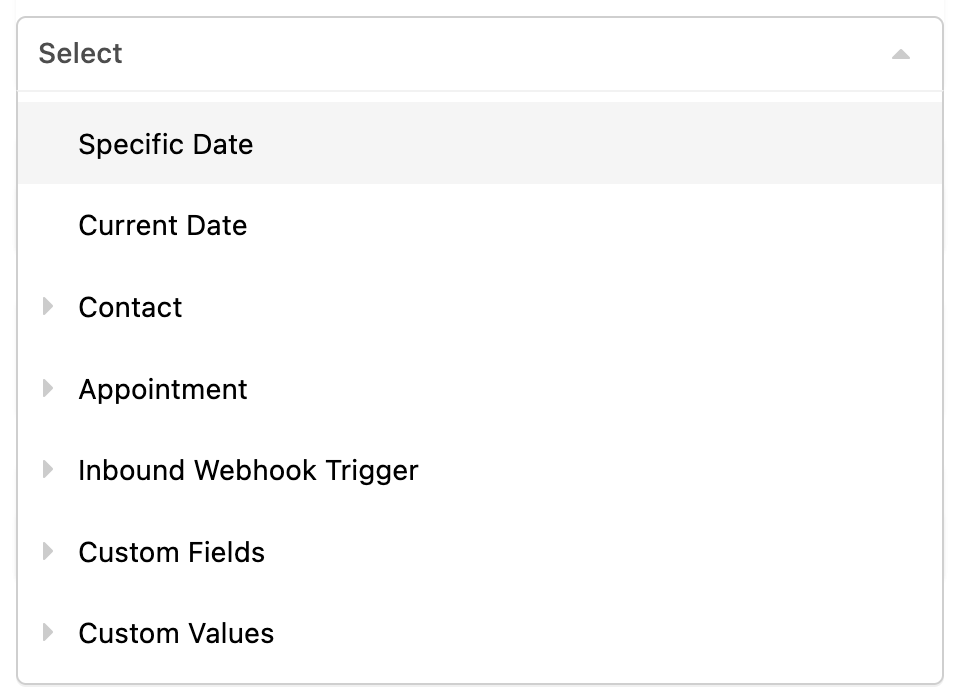
Choose the start date from various sources such as a Specific Date, Current Date, Contact’s date fields, date type custom fields, Appointment start/end date, Custom values, or an Inbound Webhook Trigger.

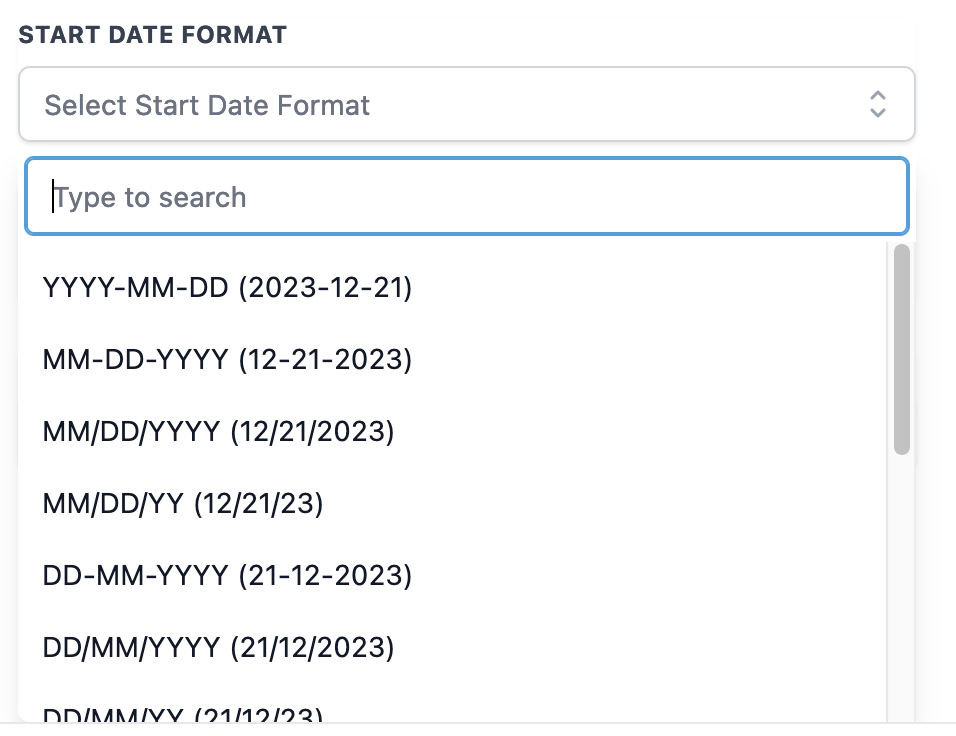
Start Date Format:
If you select a system field like Specific Date, Current Date, Contact’s date type standard or custom fields, or Appointment start/end date, the tool will auto-detect the format and preselect it. You must manually select the matching format if you choose a Custom Value or an Inbound Webhook Trigger.
End Date Selection:
Choose the end date from the same sources as the start date (Specific Date, Current Date, Contact’s date fields, date type custom fields, Appointment start/end date, Custom values, or from an Inbound Webhook Trigger).
End Date Format:
Like the start date format, the tool will auto-detect the format and preselect it if you choose a system field. You must manually select the matching format for Custom Value or Inbound Webhook Trigger.

Output:
After setting up the Compare Dates function, you can use the result in subsequent actions within your workflow. The output, representing the difference in days, can be accessed using the dynamic variable: {{datetime_formatter.1.days}}
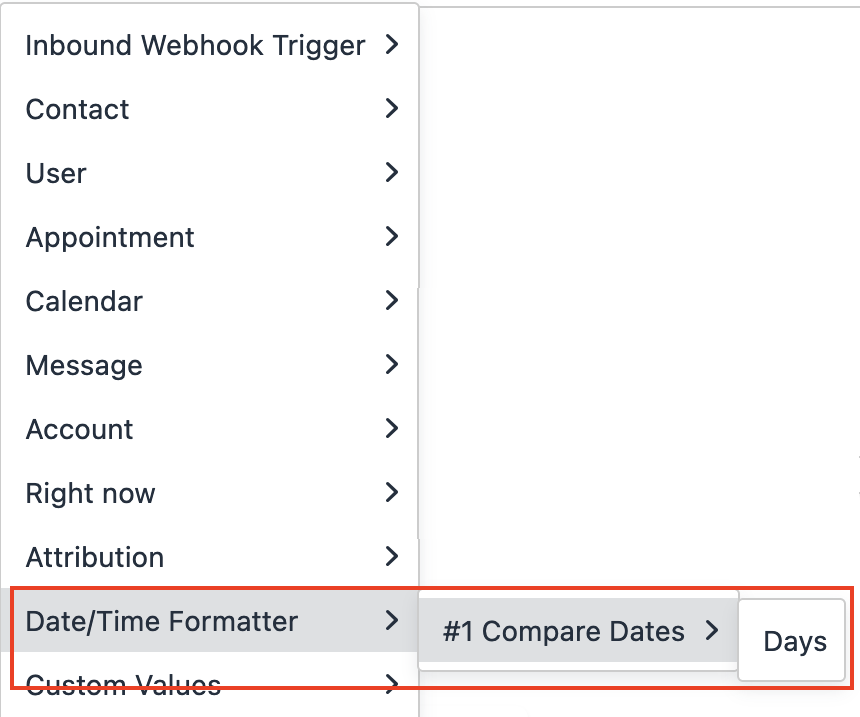
Please Note:The difference is calculated as End Date – Start Date. You will get a negative value if the Start Date exceeds the End Date. The Compare Dates function is beneficial for users who need to perform date comparisons for various purposes, such as calculating due dates, determining the duration between events, or making decisions based on the time difference between two dates.
Points to remember:
- Format the Inbound Webhook Trigger data to Set Event Start Date, to update Contact Custom Fields, and to compare in If/Else Condition.
- Let’s say the date format is MM/DD/YYYY, but you need to send it to an app that formats dates as DD/MM/YYYY; you can use the Date/Time Formater to change the date format and send it via Custom Webhook.
- Store the custom formatted date time info in Google Sheets
- Use the custom formatted date time info in Email/SMS/Slack
- Compare the Current date(Start Date) with the Invoice Due date(End Date) and use the dynamic value in Email/SMS/Slack,
- Eg: Your Invoice is due in {{datetime_formatter.1.days}} days,
- Note: On overdue, that is when Current Date(Start Date) is greater than the Invoice Due Date(End Date), you will get the result in a negative value
